Viewing a derived bitcoin address

This section contains detailed instructions on how to review funds in Bitcoin after a pegout by:
- Convert RBTC - BTC
- Import a key in Electrum
- Import in Electrum if you are using hardware wallets
Why derive address using Electrum?
During the pegout process, the destination address of your BTC is derived from your signature, this enables one to know which address will receive the BTCs, to view the destination address, follow this step by step guide.
Prerequisites:
- Wallet private key
- Electrum
- Rootstock Utils
How to view a derived address
A derived address is the BTC address derived from the RBTC account. When using the PowPeg app, it is important to know which address you will receive your BTCs. See Viewing advanced details.
We will learn how to view a derived address using Metamask to get a private key. We will also learn how to convert RBTC - BTC and Import a Key in Electrum.
Getting a wallet private key
Using Metamask
Step 1: Open the Metamask wallet on your browser, you can find this in the extensions tab in your browser.
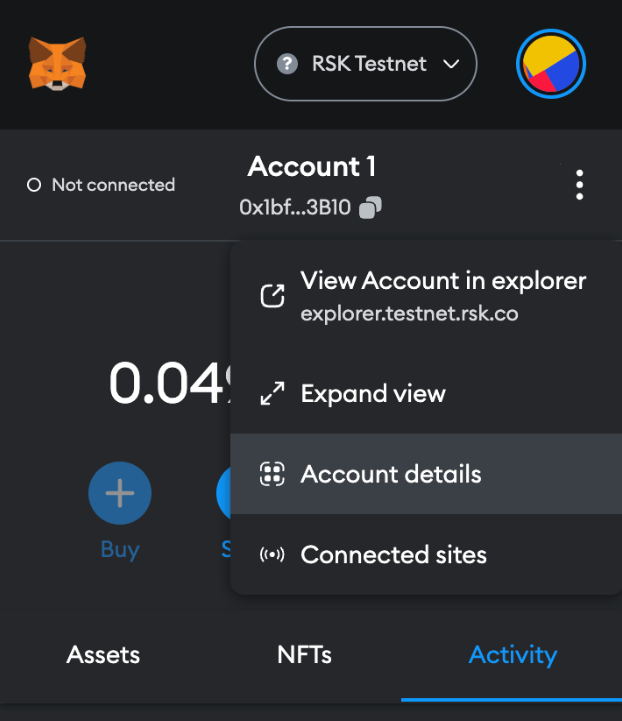
Step 2: Click on the menu icon by the right
Step 3: Choose “Account details”
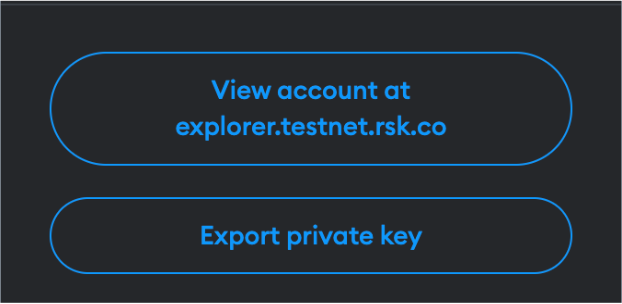
Step 4: Then click on the “Export private key” button
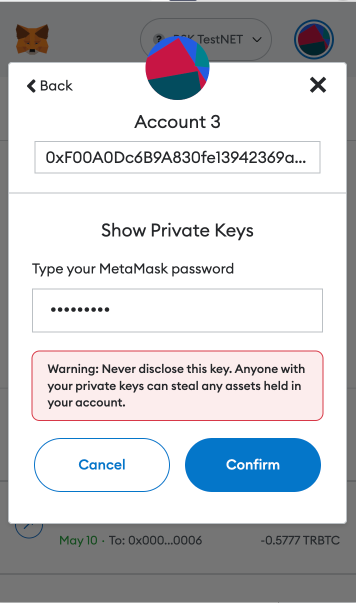
Step 5: Fill out wallet password and click on “Confirm”
Step 6: Copy the private key and click on “Done”
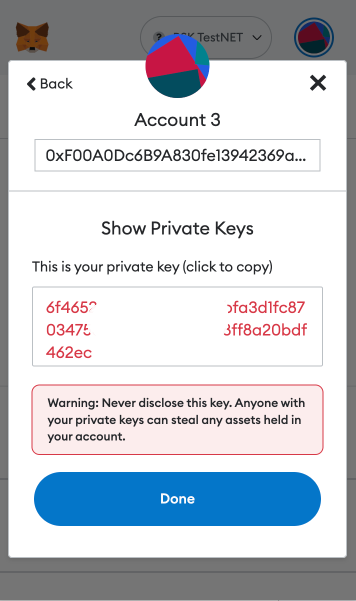
Converting RBTC to BTC
Before converting the funds, we need to convert the private key into a Wallet Import Format (WIF). A WIF private key is just another way of representing your original private key. If you have a WIF private key, you can always convert it back in to its original format.
For more info on WIF, see the Bitcoin Wiki
Using Rootstock Utils (Recommended)
Rootstock Utils is used to convert keys from BTC to Rootstock.
Step 1: Clone the Rootstock utils project.
Step 2: Follow the steps explained in the README.
Step 3: Install webpack using the code below;
javascript npm install webpack@4.46.0 -g npm i webpack-cli@3.3.12 -g npm install webpack
[Optional] you will need npm to install webpack:
npm install -–save-dev webpack
Step 4: Run webpack
webpack
Step 5: Open the file in your browser
./build/index.html
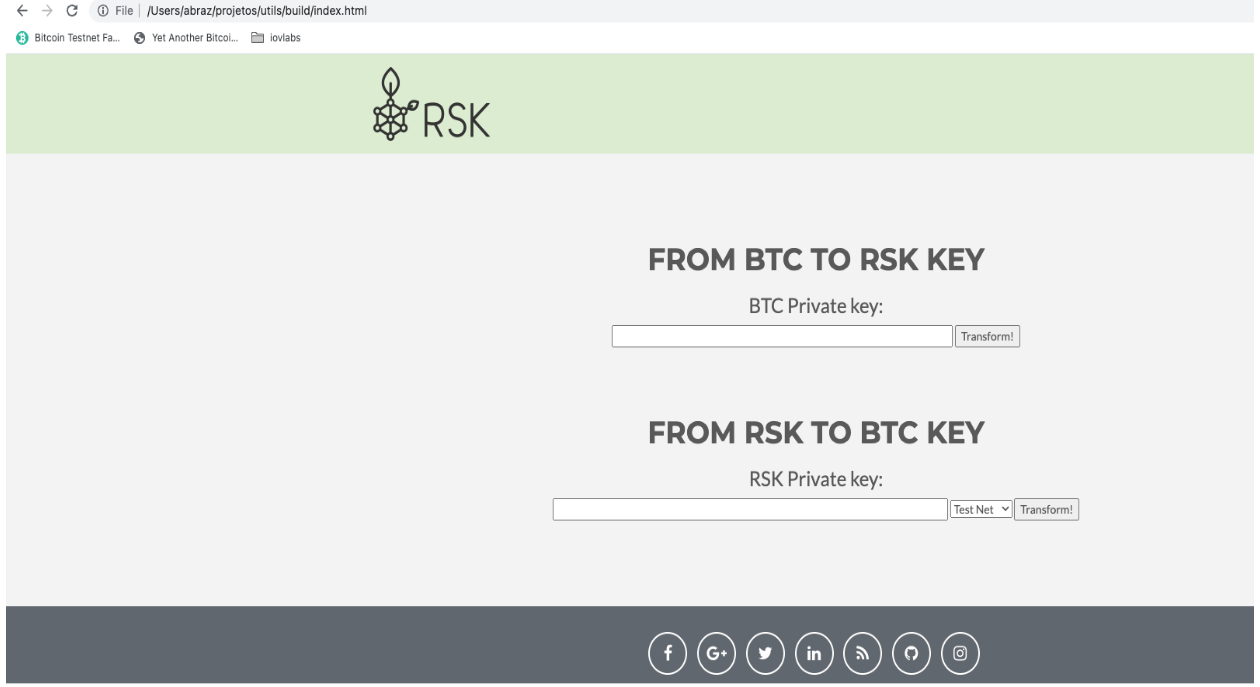
Step 6: Open the generated application and add your private key and convert to WIF, as shown in the image below:
Using LearnMeABitcoin
- IMPORTANT: We discourage users from using websites on the internet, note that if your private key is exposed, your funds will also be exposed, therefore it's recommended that you use the offline option, like Rootstock utils.
Follow the steps below to get started;
Step 1: Visit the url: https://learnmeabitcoin.com/technical/wif
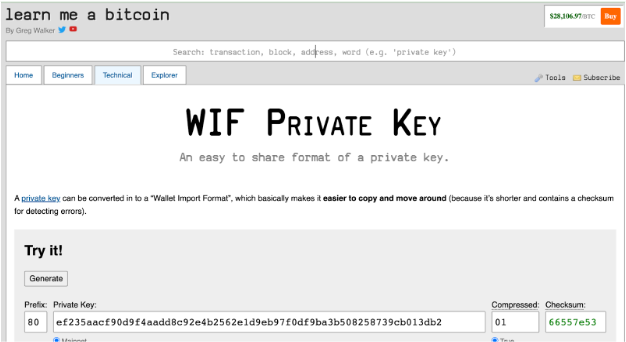
You will find the Ruby code and a tool to convert the private key into a WIF.
Step 2: Paste the private key gotten in Getting a wallet private key in the “Private Key” field
Step 3: Choose the network: Mainnet or Testnet
Step 4: Choose compressed option true
Step 5: Copy WIF value
- IMPORTANT: Using the Ruby code is highly recommended
- This code requires the
checksum.rbandbase58_encode.rbfunctions as shown in the code below.
Download the 'checksum' file here. Download the 'base58_encode' file here.
require_relative 'checksum'
require_relative 'base58_encode'

##### Convert Private Key to WIF

privatekey = "4fd050a8e4fd767f759d75492b9894bc97875e8201873e38443e3f5eae9c8db2f"
extended = "80" + privatekey + "01"
extendedchecksum = extended + checksum(extended)
wif = base58_encode(extendedchecksum)

puts wif
Import key in Electrum
Electrum is used to verify a derived address, this address will then be used to receive and verify the converted funds (RBTC - BTC) when the pegout process is finished.
Step 1: Download Electrum for your OS from the website.
Follow the steps below to create a new wallet in Electrum and import the private key:
NOTE: If you need to run Electrum in Testnet, execute the following commands:
cd /Applications/Electrum.app/Contents/MacOS
./run_electrum --testnet
Step 2: Start with the “Create New Wallet” option
Step 3: Fill out a new wallet name and click on the “Next” button
Step 4: Choose “Import Bitcoin addresses or private keys” option and click on “Next” button
Step 5: Fill out the WIF value of the private key and click on “Next” button
Step 6: Create a new wallet password and click on the “Next” button
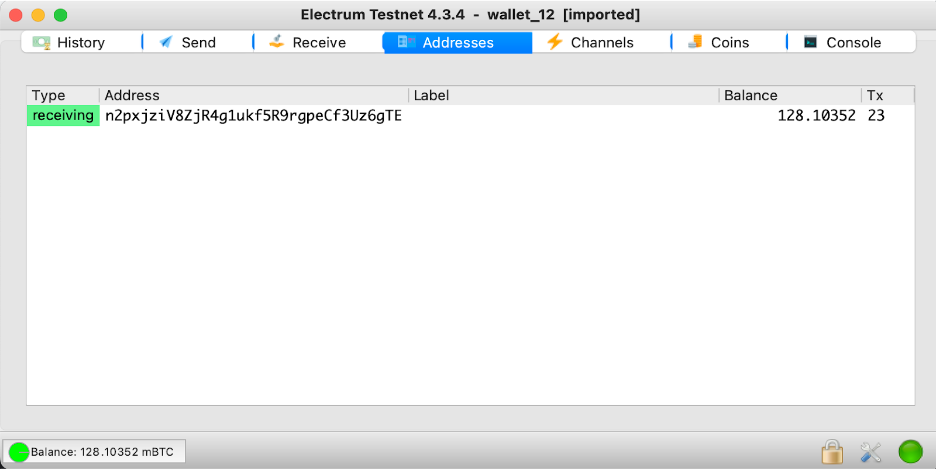
In this screen, you will see the address to receive the BTC funds.
Import key in Electrum using Hardware Wallets
Electrum is used to verify a derived address, this address will then be used to receive and verify the converted funds (RBTC - BTC) when the pegout process is finished.
Step 1: Download Electrum for your OS from the website.
Follow the steps below to create a new wallet in Electrum and connect to the hardware wallets:
NOTE: If you need to run Electrum in Testnet, execute the following commands:
cd /Applications/Electrum.app/Contents/MacOS
./run_electrum --testnet
Step 2: Start with the “Create New Wallet” option
Step 3: Fill out the name in “Wallet” field and click on “Next” button
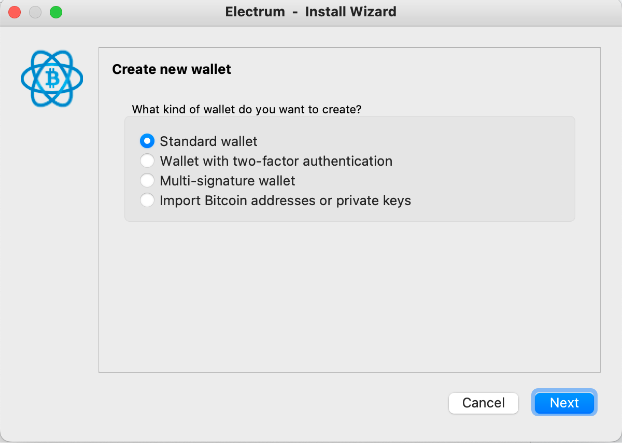
Step 4: Select “Standard wallet” option and click on “Next” button
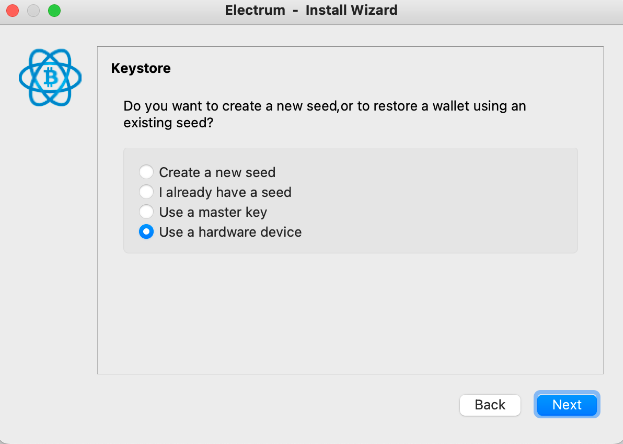
Step 4: Select “Use a hardware device” option and click on “Next” button
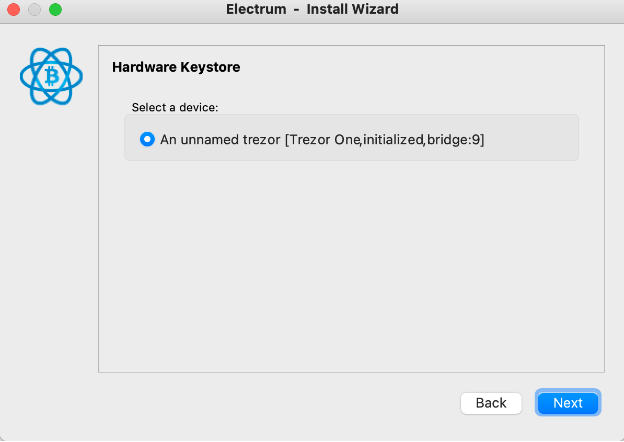
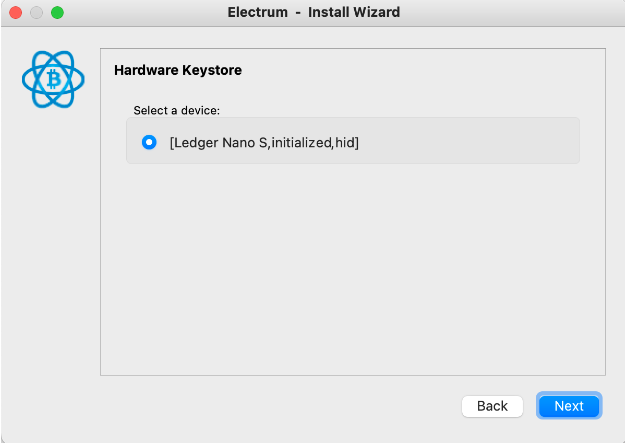
Step 5: Select the hardware wallet and click on “Next” button
NOTE: The follow screen is an example of usage the Trezor Hardware Wallet
NOTE: The follow screen is an example of usage the Ledger Hardware Wallet
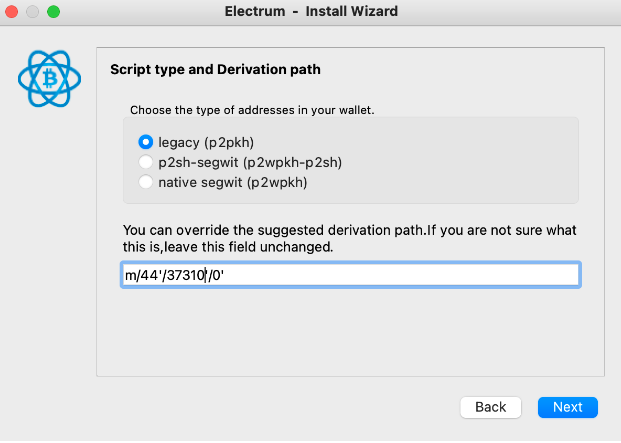
Step 6: Select “legacy (p2pkh)” option, fill out a custom derivation path field and click on “Next” button
Custom derivation path:
Mainnet: m/44'/137'/0'
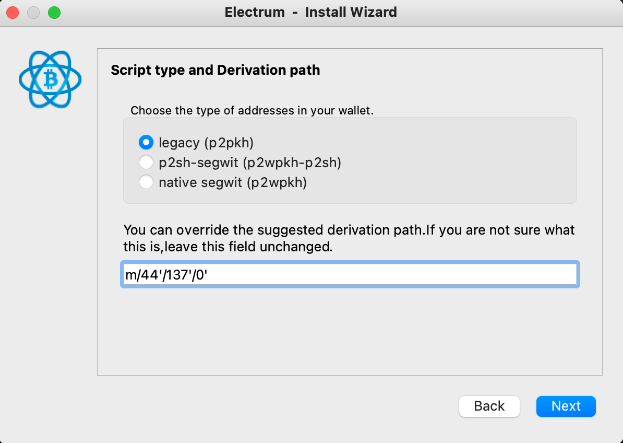
NOTE: Testnet: m/44'/37310'/0'
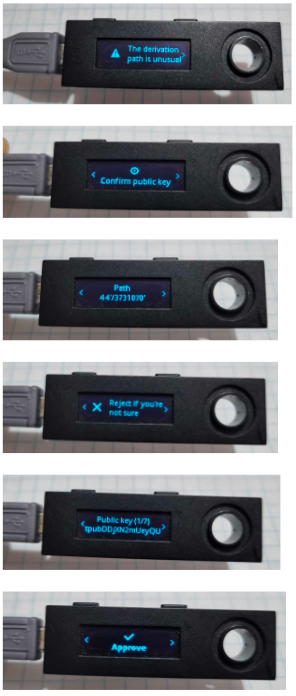
IMPORTANT: For Ledger it is necessary to approve the custom derivation path in the device
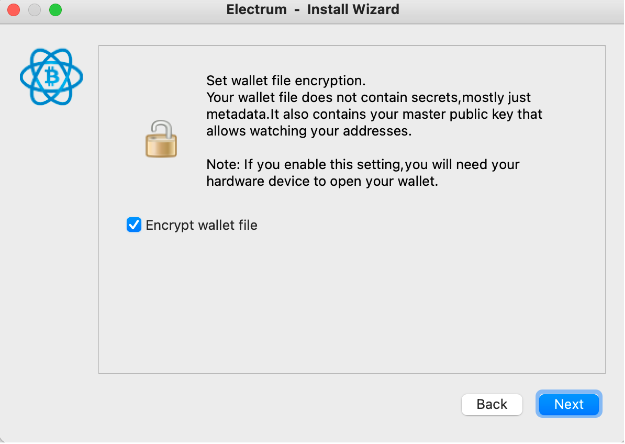
Step 7: Check “Encrypt wallet file” option and click on “Next” button
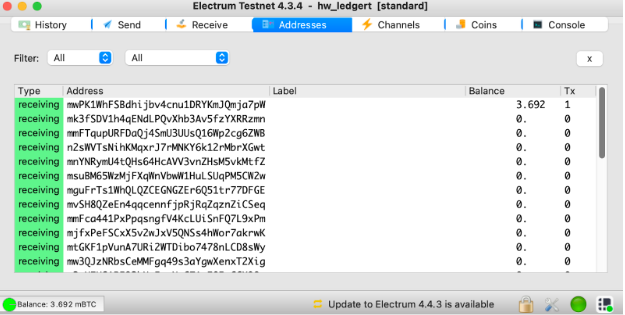
Step 8: Finally in Electrum go to “Addresses” tab and you can see your funds
